This was such a pretty quilt to make. The fabrics made it seem so dainty for a little baby girl. We had a baby shower and we needed something quick but I wanted it to not look like a "quick" quilt. I love how this turned out.
First, I decided to make the triangles six inches. I thought this size would show off the fabric best. I began cutting the fabrics into 6" x WOF strips. I sewed them strips together down both long sides of the fabric.
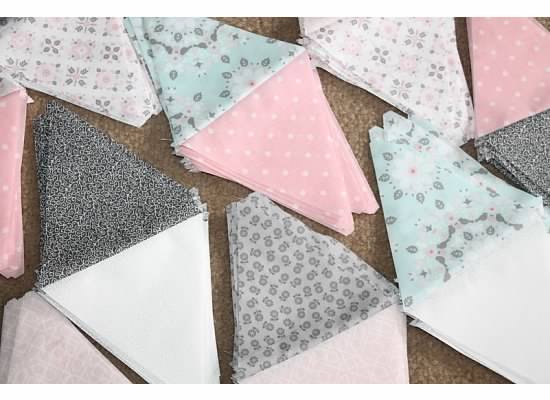
Then it was time for cutting. I lined my isosceles triangle ruler up with the point on one edge of the fabric and the 6" line on the other. I continued down the strip, rotating my ruler.
Unstitch the few stitches at the point of each set of triangles. Press open and continue until you have lots of triangles.
After all the seams are pressed on the triangles. You can begin to lay out your pattern. You will sew the rows diagonally. The picture below has the different stages. The row farthest to the right are the triangle sets laid out to be sewn together. The row next to it has been sewn together and then the next section is what it will look like once you sew two rows together. You will need to unstitch or cut some single triangles to fill the the top and bottom rows of the quilt. When cutting the sides of the quilt, I lined my ruler up with the points of the triangles and cut them down the center.
My son is tall enough to be a great model for quilts. There is a lot of groaning going on behind that quilt even though the clouds make it seem beautiful.
When I quilted it, I used the edge of my presser foot as a guide and sewed down both sides of the seams on the triangles. This is the design on the back and the beautiful backing fabric that was my main fabric of inspiration.
The mommy-to-be was in love with the quilt. That's exactly what I hoped for!